Your travel-size products are leaking, frustrating customers and hurting your brand. This costs you money and trust. The solution lies in choosing the right packaging and demanding rigorous testing.
To prevent leaks, you must focus on three key areas. First, select a bottle with a compatible material and a secure cap design. Second, ensure the cap has a quality liner. Finally, insist your supplier performs a vacuum leak test before shipping.

Finding the right travel-size bottle can feel overwhelming. You see so many options, but you don’t know which ones will actually protect your product and your brand’s reputation. A single leak can lead to a bad review, a lost customer, and a damaged shipment. It’s a risk you can’t afford to take. But don’t worry, I’m here to break down exactly what you need to look for. I’ve spent over a decade in this business, and I’ve learned that preventing leaks comes down to a few critical details that many people overlook. Let’s dive into what makes a bottle truly reliable.
What makes a bottle cap truly leak-proof?
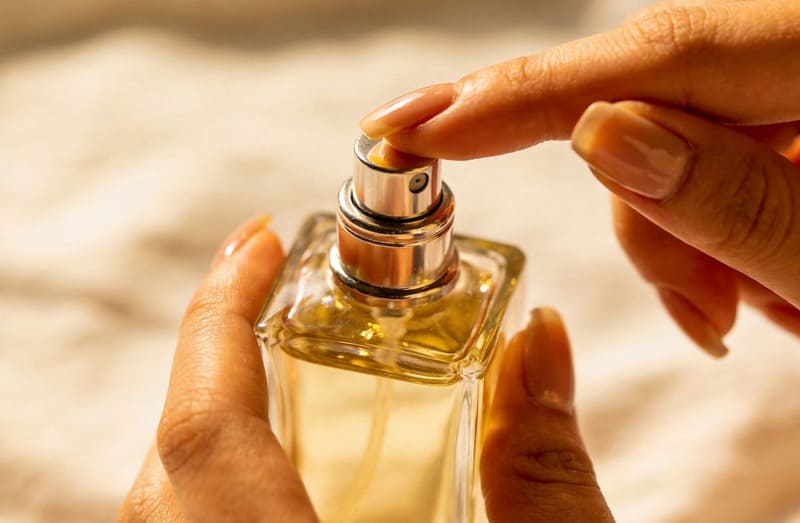
A loose cap can create a huge mess inside a customer’s bag. They hate it, and they’ll blame your brand. A secure cap design is the simple key to avoiding this disaster.
A truly leak-proof cap combines a precise thread design with a quality liner or gasket inside. This combination, made from the right materials, creates a tight, airtight seal against the bottle’s opening, stopping any liquid from escaping.

When I work with clients like Omar from Iraq, who customizes gift sets, the seal is everything. His customers expect a premium experience, and a leak would ruin it. We focus on two main parts of the cap to ensure this doesn’t happen: the threads and the liner.
The Importance of Threading
The threads are the helical ridges on the bottle neck and inside the cap. For a good seal, they need to match perfectly. A deeper, continuous thread provides more surface contact, creating a tighter grip. If the threads are too shallow or poorly molded, the cap can easily become loose or cross-threaded, which is a primary cause of leaks. We always check the molding precision to ensure every cap twists on smoothly and securely.
Liners and Gaskets for an Extra Seal
The liner is a small disc of material inside the cap that presses against the rim of the bottle. This is your second line of defense. It closes any tiny gaps that might exist between the cap and the bottle.
| Liner Type | Best For | How It Works |
|---|---|---|
| Foam Liner (PE/PP) | Lotions, creams, general use | A simple foam disc that compresses to create a seal. Good for preventing minor leaks. |
| Induction Seal | Serums, oils, liquids | A foil liner that is heat-sealed onto the bottle rim. Provides a tamper-evident, airtight seal. |
| Plug Seal | Thick creams, gels | A plastic ring inside the cap that fits snugly into the bottle opening. |
Choosing the right combination of threads and liners is the first major step toward a completely leak-proof product.
Why is material selection so important for preventing leaks?
Using the wrong plastic can cause it to warp, crack, or even dissolve. This leads to leaks and very unhappy customers. Choosing the right material from the start is crucial for durability.
Material selection is vital because different cosmetic formulas react with plastics in different ways. The right material, like PET or PP, ensures chemical compatibility. This prevents the bottle from degrading and causing leaks.

I remember a client, Anna, who runs a cosmetics brand in Thailand. She was developing a new facial oil. Her initial packaging choice was a standard plastic that wasn’t right for her formula. The oil started to make the bottle walls soft, and she was worried about leaks during shipping. We had to act fast. We switched her to a PETG bottle, which has excellent chemical resistance to oils. This small change saved her entire product launch. Her experience shows why you can’t just pick a bottle because it looks good. You have to consider what’s inside.
Chemical Compatibility is Key
Your product’s ingredients determine which plastic you should use. Alcohols, essential oils, and certain acids can be aggressive. They can break down the structure of incompatible plastics over time. This process, called crazing, creates tiny cracks that lead to slow leaks.
Flexibility vs. Rigidity
The material’s physical properties also matter. A bottle needs to be rigid enough to hold its shape but flexible enough to handle pressure changes, especially during air travel. When a plane ascends, the air pressure in the cabin drops, causing the air inside the bottle to expand. If the material is too rigid and the seal isn’t perfect, the product can be forced out.
| Material | Common Use | Chemical Resistance | Flexibility |
|---|---|---|---|
| PET | Serums, lotions, toners | Good general resistance | Semi-rigid |
| HDPE | Shampoos, conditioners | Excellent resistance | Flexible |
| PP | Jars, caps, airless pumps | Very high resistance | Rigid and tough |
| PETG | Luxury oils, serums | Excellent oil resistance | Rigid and clear |
Understanding how your formula interacts with these materials is fundamental. It’s a conversation we have with every client to prevent problems before they start.
How does rigorous testing guarantee a leak-free bottle?
You think your bottles are secure, but can you be sure? Shipping untested bottles is a huge financial risk for your brand. Proper, professional testing provides the proof and peace of mind you need.
Rigorous testing, especially a vacuum leak test, simulates real-world conditions like air freight pressure changes. By placing filled bottles in a vacuum chamber, we can definitively identify any potential leaks before they ever reach your customers.

This is the most important step in our quality control process. I insist on it for every single batch we produce. A visual check isn’t enough. A bottle can look perfect but have a micro-fracture or a poorly fitted seal that only fails under pressure. The vacuum test is the only way to be 100% certain. It’s how we guarantee that the packaging we supply is ready for the journey from our factory to your customer’s hands, no matter where in the world that is.
The Vacuum Test Explained
This test mimics the pressure changes that happen during air travel. It’s a simple but highly effective process. First, we take a sample of bottles from the production line and fill them with liquid, usually water. Then, we securely tighten the caps and place the bottles inside a vacuum chamber. We reduce the pressure inside the chamber to a specific level and hold it for a set period. For high-value products or new designs, we might even run the test for an extended time, up to 24 hours, to be absolutely sure. We watch closely for any bubbles escaping from the cap or any drop in the liquid level. Any sign of a leak means the batch is stopped and inspected.
Why This Test is Non-Negotiable
This test finds problems that are invisible to the naked eye. It ensures that your product will arrive safely, whether it’s being shipped across the country or across the world. It protects your investment, prevents costly returns, and, most importantly, protects your brand’s reputation for quality.
| Quality Control Check | Purpose | What We Look For |
|---|---|---|
| Step 1: Visual Inspection | Catch obvious defects | Cracks, molding errors, improper thread formation. |
| Step 2: Manual Seal Test | Check the cap fit | Smooth tightening, no cross-threading, secure fit. |
| Step 3: Vacuum Chamber Test | Simulate real-world pressure | Air bubbles, liquid seepage, pressure loss. |
By following these three steps, we ensure every bottle we ship is ready for the real world.
Conclusion
To prevent leaks, focus on cap design, choose the right material for your formula, and always insist on a vacuum test. This ensures your product is secure and your customers are happy.