Skip to content
 Starting a cosmetic line with unique packaging can feel overwhelming. Commercial options might be too expensive or generic for your brand’s vision. Creating handmade packaging offers a personal touch.
To make handmade cosmetic packaging, select appropriate materials like cardstock or fabric, design a template for your container (e.g., box, pouch), cut and assemble it using adhesives or stitching, and then decorate it with labels, stamps, or other embellishments to reflect your brand.

Creating your own cosmetic packaging can be a rewarding way to infuse your brand with personality and stand out, especially when you’re starting small. As someone who’s been in the packaging industry for over 20 years with ShineTop, I’ve seen the power of unique presentation. While we specialize in large-scale manufacturing, I appreciate the craft and creativity of handmade solutions. Let’s explore how you can approach this.
What is the Best Material for Cosmetic Packaging?
Choosing the wrong material can lead to damaged products or a cheap look. Your packaging needs to be protective, attractive, and suitable for your specific cosmetic item.
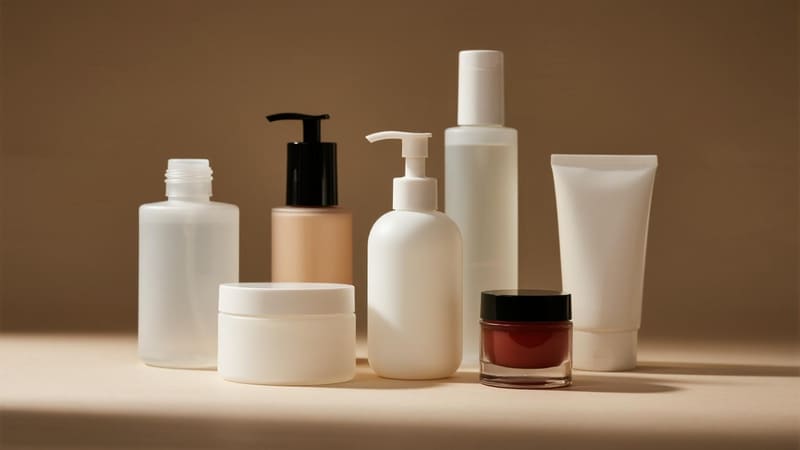
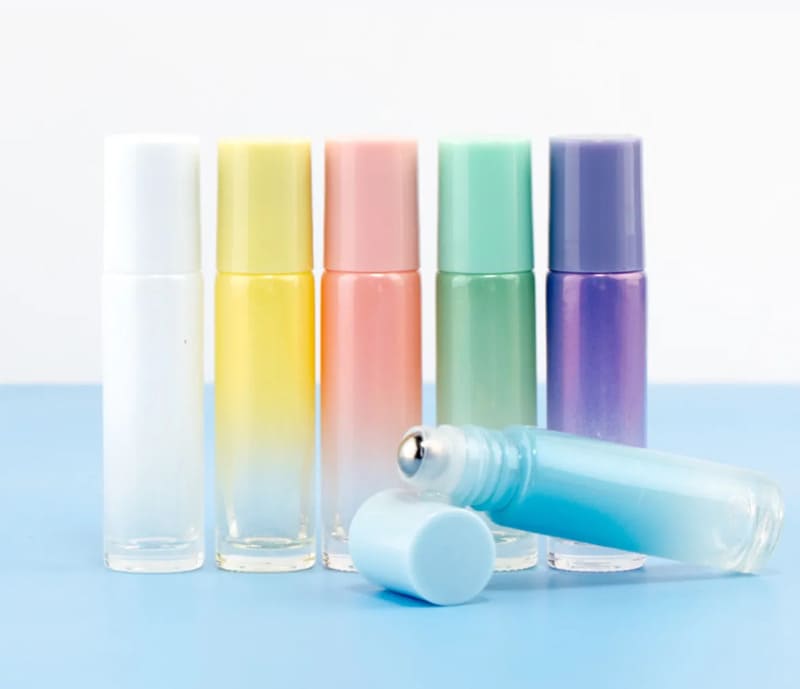
The "best" material depends on the cosmetic type and brand aesthetic. For handmade packaging, sturdy cardstock, kraft paper, fabric pouches, small tins, or glass jars are popular. Consider product compatibility, durability, and visual appeal.

When you’re making packaging by hand, your material choices are guided by what’s accessible, workable, and fits your brand’s image. You also need to think about how the material will interact with your product.
Common Handmade Packaging Materials:
-
Paper-Based Materials:
- Cardstock/Cover Stock: Available in various weights, colors, and textures. Great for making small boxes, sleeves, or tags. It’s easy to cut, fold, and print on.
- Kraft Paper: Gives a natural, rustic, or eco-friendly look. Good for boxes, wraps, and labels.
- Corrugated Cardboard (thin): Can be used for more structured boxes, especially for shipping or for a very rustic look.
- Specialty Papers: Handmade paper, textured paper, or patterned paper can add a unique touch.
-
Fabric:
- Muslin, Cotton, Linen: Ideal for making drawstring pouches or wraps. They offer a soft, natural feel.
- Organza or Velvet: Can provide a more luxurious feel for small items like lip balms or sample-sized products.
-
Reusable Containers (often purchased then customized):
- Small Tins: Metal tins (aluminum or steel) are great for balms, solid perfumes, or salves. You can then add custom labels or sleeves.
- Small Glass Jars: Perfect for creams, scrubs, or powders. Again, the handmade aspect comes from labeling, tags, or outer boxing.
- Wooden Boxes (small): Can be used for a very premium, artisanal feel, often decorated by hand (painting, wood burning).
Here’s a quick comparison for handmade primary packaging:
| Material | Pros | Cons | Best For (Handmade Context) |
|---|---|---|---|
| Cardstock/Paper | Customizable, printable, versatile, affordable | Not waterproof, can crush easily if not sturdy | Small boxes, sleeves, labels, tags |
| Fabric Pouches | Reusable, soft, unique texture, easy to make | Not rigid, offers less physical protection | Lip balms, soaps, bath bombs, samples |
| Tins | Durable, good barrier, reusable | Harder to customize beyond labeling | Balms, salves, solid perfumes |
| Small Glass Jars | Premium feel, good barrier, reusable, inert | Breakable, heavier, needs careful labeling | Creams, scrubs, powders, oils |
Anna, a cosmetics manufacturer in Thailand I work with, sometimes creates limited-edition handmade packaging for special promotions. She often uses beautiful local Thai papers for outer wraps on small gift sets. This adds a unique, personal touch that her customers love.
How to Make Your Own Packaging Box?
Pre-made boxes might not fit your product perfectly or reflect your brand’s unique style. Designing and making your own boxes gives you full control over size, shape, and appearance.
To make your own packaging box, design or find a template, trace it onto sturdy cardstock, cut it out carefully, score the fold lines, fold along the scored lines, and then glue or interlock the tabs to assemble the box.

Making your own boxes by hand can be very satisfying. It allows for complete customization. Here’s a general process:
Steps to Create a Handmade Box:
-
Design and Template:
- Determine Size & Style: Decide on the dimensions needed for your product and the type of box (e.g., simple tuck-top box, two-piece box, pillow box).
- Create a Template: You can draw your own template (a "net" of the unfolded box) or find many free templates online by searching for "DIY box template" or "paper box template."
- Test with Plain Paper: Always make a mock-up with cheap paper first to ensure the size and design work before using your good cardstock.
-
Material Selection:
- Choose a sturdy cardstock. The weight will depend on the size of the box and the weight of your product. For small cosmetic items, 200-300 gsm cardstock is often suitable.
-
Trace and Cut:
- Carefully trace your template onto the cardstock using a pencil.
- Cut out the shape using a sharp craft knife (X-Acto knife) and a ruler for straight lines, or sharp scissors. A cutting mat is essential if using a craft knife.
-
Score Fold Lines:
- This is a crucial step for clean, crisp folds. Use a scoring tool (like a bone folder, an empty ballpoint pen, or the back of a butter knife) and a ruler to press indentations along all the lines that need to be folded.
-
Fold and Assemble:
- Gently fold along all the scored lines.
- Apply adhesive (strong craft glue, double-sided tape) to the tabs or flaps as indicated by your template.
- Press the glued parts together firmly and hold until the adhesive sets. Some box designs are self-locking and don’t require glue.
-
Decorate and Brand (Optional but Recommended):
- Add labels with your brand name, product information, and ingredients.
- Use stamps, stickers, ribbons, twine, or hand-drawn designs to personalize the box.
Here are some tools that are helpful:
| Tool | Purpose |
|---|---|
| Craft Knife | Precise cutting |
| Cutting Mat | Protects surfaces, aids in straight cuts |
| Ruler (Metal) | Measuring, guiding cuts and scores |
| Scoring Tool | Creating crisp fold lines |
| Bone Folder | Scoring, burnishing folds, smoothing adhesive |
| Strong Adhesive | Securing box flaps |
| Scissors | Cutting (less precise than a knife for boxes) |
I remember a startup client who made beautiful handmade soaps. They started by making simple kraft paper boxes using this method. It allowed them to get their product to market with a professional, branded look without a huge upfront investment in custom-manufactured packaging.
Do You Need a License to Sell Homemade Makeup?
Selling homemade makeup involves more than just creating products. Legal requirements can be confusing, and non-compliance can lead to serious problems. Understanding the regulations is crucial.
Yes, in most countries (including the US, EU, Canada, Australia), you need to comply with cosmetic regulations to sell homemade makeup. This often involves ingredient safety, proper labeling, good manufacturing practices (GMP), and potentially registration or notification, though a specific "license" might vary by region.

This is a very important question, and the answer is generally yes, you need to follow specific rules. Selling cosmetics, even homemade ones, is regulated to protect consumer safety. While you might not need a "license" in the same way a doctor does, you absolutely must comply with the cosmetic laws and regulations in the country or region where you plan to sell.
Key Regulatory Areas for Homemade Cosmetics:
-
Ingredient Safety:
- You are responsible for ensuring all ingredients are safe for their intended use.
- Be aware of prohibited and restricted substances. For example, the FDA in the US and the EU Cosmetics Regulation have lists of these.
- Color additives must be approved for cosmetic use.
-
Proper Labeling:
- Labels must include specific information:
- Product identity (e.g., "Lip Balm")
- Net quantity of contents (e.g., 15g or 0.5 oz)
- Ingredient list (in descending order of predominance)
- Name and place of business (manufacturer or distributor)
- Any necessary warning statements (e.g., "For external use only")
- Labeling requirements are very detailed (font size, placement).
- Labels must include specific information:
-
Good Manufacturing Practices (GMP):
- Even if making products at home, you need to follow GMP principles. This means producing your cosmetics in a clean, sanitary environment, using appropriate equipment, and keeping records to ensure product consistency and safety. This helps prevent contamination.
-
Registration/Notification (Varies by Region):
- In some regions, like the EU, you need to register your products and company on a central portal (CPNP).
- In the US, the FDA has a Voluntary Cosmetic Registration Program (VCRP), but it’s not mandatory for selling, though it’s encouraged. However, you are still responsible for safety and labeling regardless of registration.
-
Product Claims:
- Be careful about the claims you make. Cosmetics are intended to cleanse, beautify, promote attractiveness, or alter appearance. If your product claims to treat or prevent disease or affect the structure or function of the body, it could be classified as a drug, which has much stricter regulations.
Here’s a simplified overview for major regions:
| Region | Key Regulatory Body/Law | Main Requirements |
|---|---|---|
| USA | FDA (Food and Drug Administration) – FD&C Act, FPLA | Safe ingredients, proper labeling, GMP. No pre-market approval for most cosmetics. |
| EU | European Commission – EU Cosmetics Regulation (EC) No 1223/2009 | Product safety assessment, CPNP notification, PIF (Product Information File), GMP. |
| Canada | Health Canada – Food and Drugs Act, Cosmetic Regulations | Notification to Health Canada, ingredient hotlist, labeling, GMP. |
I always advise clients, even those starting small like Anna did with her initial homemade batches, to thoroughly research the specific regulations in their target market. It’s better to be compliant from day one. Consulting with a regulatory expert can be a wise investment.
How Much Does It Cost to Start a Cosmetic Line?
Dreaming of your own cosmetic line is exciting, but financial realities can be daunting. Costs can vary wildly, making it hard to budget. Understanding potential expenses is key to planning.
The cost to start a cosmetic line can range from a few hundred dollars (for very small-scale, homemade operations) to tens or hundreds of thousands of dollars (for larger launches with lab formulation and contract manufacturing). Key expenses include ingredients, packaging, testing, branding, and legal compliance.

The investment needed to launch a cosmetic line depends heavily on your scale, product complexity, and how much you do yourself versus outsourcing.
Potential Startup Costs for a Cosmetic Line:
-
Formulation & Ingredients (Variable: $50 – $10,000+):
- DIY: Cost of raw ingredients, research, and small-scale equipment. Can be low initially.
- Lab Formulation: Hiring a cosmetic chemist can cost $1,000 – $5,000+ per formula.
- Private Label/White Label: Buying pre-made formulas and branding them as your own. Lower R&D cost, but less unique.
-
Packaging (Variable: $50 – $20,000+):
- Handmade/Stock Packaging (DIY): Cost of materials for handmade boxes, stock jars/bottles, labels. Can be very low per unit initially.
- Custom Packaging (like from ShineTop): Involves mold costs, minimum order quantities (MOQs). Can be a significant investment but offers strong branding. For example, Mohammed’s order of 25,000 custom drawer boxes was a substantial but worthwhile investment for his client’s brand.
-
Testing & Compliance (Variable: $0 – $5,000+):
- Basic DIY: Minimal if you are very small and only selling locally (but still need to ensure safety).
- Stability Testing, Preservative Efficacy Testing (PET), Microbiological Testing: Can cost several hundred to a few thousand dollars per product. Often essential for water-based products or for wider distribution.
- Regulatory Consultation: If needed, can add to costs.
-
Branding & Marketing (Variable: $50 – $10,000+):
- DIY Branding: Logo design (can use free tools or hire a freelancer for a modest fee), website (DIY platforms).
- Professional Branding: Hiring a design agency for logo, brand guidelines, website can be thousands.
- Marketing Materials: Business cards, brochures, online ads.
-
Business Operations & Legal (Variable: $100 – $2,000+):
- Business registration/licensing fees.
- Insurance (product liability insurance is highly recommended).
- Website hosting, e-commerce platform fees.
Here’s a rough idea of scale vs. cost:
| Scale of Operation | Estimated Startup Cost Range | Key Characteristics |
|---|---|---|
| Hobbyist/Very Small Batch | $100 – $1,000 | DIY everything, local sales (e.g., farmer’s markets), simple packaging. |
| Small Indie Brand | $1,000 – $10,000 | Some outsourcing (e.g., graphic design), basic lab testing, online sales. |
| Growing Brand / Contract Mfg | $10,000 – $100,000+ | Professional formulation, custom packaging, comprehensive testing, wider distribution. |
When I started ShineTop over 20 years ago, we focused on helping brands scale their packaging. But I’ve seen many entrepreneurs begin with very modest budgets, making smart choices about where to invest. The key is to plan carefully, prioritize safety and compliance, and grow sustainably.
Conclusion
Making handmade cosmetic packaging can be a fulfilling start. Focus on quality materials, careful assembly, and clear branding. Always prioritize product safety and understand the legal requirements for selling cosmetics in your market.