Skip to content
 Want to add a personal, professional touch to your homemade creations, gifts, or small-batch products? Making your own bottle labels at home can be a fun and rewarding DIY project.
To make bottle labels at home, design your label using graphic software or a template, print it onto suitable label paper (sticker paper, waterproof vinyl, or cardstock), cut it out, and then apply it to your clean bottle using its adhesive backing or a separate adhesive like glue or milk.

Creating custom labels can elevate the look of your hand-poured candles, homemade sauces, craft beers, or even just organizing your pantry. As someone in the packaging industry with ShineTop, I appreciate the impact of a good label, whether it’s mass-produced or lovingly handmade. Let’s explore how you can do this yourself.
How Do You Label Bottles at Home?
Labeling bottles at home doesn’t require expensive equipment. With a few basic supplies and some creativity, you can achieve surprisingly professional-looking results.
To label bottles at home, first design your label digitally or by hand. Then, print your design onto adhesive label sheets or regular paper/cardstock. Cut out the labels, and if using non-adhesive paper, apply glue or another adhesive before carefully affixing the label to the clean, dry bottle surface, smoothing out any bubbles.

The process can be broken down into a few key stages, from concept to application.
Step-by-Step Guide to Home Bottle Labeling:
-
Design Your Label:
- Software Options:
- Professional: Adobe Illustrator, Photoshop, Affinity Designer.
- User-Friendly/Free: Canva, Avery Design & Print Online, Microsoft Word/Pages (using tables or text boxes), GIMP.
- Online Label Generators: Many websites offer templates specifically for bottle labels.
- Key Information: Include product name, ingredients (if applicable), volume, your name/brand, and any decorative elements.
- Size & Shape: Measure your bottle to determine the appropriate label size. Consider wrap-around labels, front-and-back labels, or unique shapes.
- Resolution: If printing, ensure your design has a good resolution (300 dpi is recommended for sharp results).
- Software Options:
-
Choose Your Label Material (Paper/Sticker):
- See the next section for details on paper types. Options range from simple printer paper to specialized waterproof sticker sheets.
-
Print Your Labels:
- Home Printer: Most inkjet or laser printers can handle label sheets or cardstock.
- Test Print: Always do a test print on plain paper first to check colors, alignment, and size.
- Printer Settings: Adjust printer settings for the type of paper you’re using (e.g., "photo paper," "labels," "cardstock").
-
Cut Out Your Labels:
- Scissors or Craft Knife: For straight edges, use a ruler and craft knife on a cutting mat.
- Paper Trimmer: Ideal for many straight cuts.
- Shaped Punches or Cutting Machine (e.g., Cricut, Silhouette): For intricate shapes or large quantities. If using pre-cut label sheets (like Avery), this step is skipped.
-
Prepare Your Bottles:
- Ensure bottles are clean and completely dry. Wipe with rubbing alcohol to remove any oils or residues for better adhesion.
-
Apply Your Labels:
- Sticker Paper: Carefully peel and stick, starting from one edge or the center and smoothing outwards to avoid air bubbles.
- Non-Adhesive Paper/Cardstock:
- Glue Stick: Apply an even coat to the back of the label.
- Spray Adhesive: Use in a well-ventilated area.
- Liquid Glue (e.g., PVA/Elmer’s): Apply a thin, even layer.
- Milk (for a rustic, removable option on glass): Surprisingly effective! Lightly brush milk onto the back of the paper label and apply. It becomes quite secure when dry but can be soaked off. Best for items not exposed to moisture.
- Alignment: Take your time to position the label straight. For wrap-around labels, ensure the ends meet neatly.
-
Optional Finishing Touches:
- Waterproofing: If using paper labels that might get wet, you can apply a clear acrylic sealer spray or cover them with clear packing tape (though this can look less professional).
- Decorative Elements: Add twine, ribbon, or a wax seal over the label for an extra touch.
What Kind of Paper is Used for Bottle Labels?
The type of paper you choose will significantly impact the look, feel, and durability of your homemade bottle labels. Different papers suit different needs and aesthetics.
Common types of paper used for homemade bottle labels include self-adhesive sticker paper (matte, gloss, clear, waterproof vinyl), regular printer paper or cardstock (applied with adhesive), Kraft paper (for a rustic look), and specialty textured papers.

Your choice of paper depends on your printer, the desired finish, whether the bottle will be exposed to moisture, and your budget.
Popular Paper Options for DIY Bottle Labels:
-
Self-Adhesive Label Sheets (Sticker Paper):
- Matte Finish: Good for a classic, understated look. Easy to write on if needed.
- Gloss Finish: Gives a more vibrant, professional, store-bought appearance. Can be slightly more prone to smudging with inkjet if not allowed to dry properly.
- Clear (Transparent) Sticker Paper: Ideal if you want the color/contents of the bottle to show through, giving a "no-label" look. Best with laser printers for opacity or specialized inkjet clear sheets.
- Waterproof/Weatherproof Vinyl Sticker Paper: Excellent for bottles that will be refrigerated, exposed to moisture (like bath products), or need to be durable. Often requires an inkjet printer that handles vinyl or a laser printer.
- Kraft Sticker Paper: Brown recycled look, great for rustic, natural, or vintage-style labels.
-
Regular Printer Paper (applied with adhesive):
- Pros: Inexpensive, readily available.
- Cons: Not durable, not waterproof unless sealed. Best for dry goods or temporary labels.
-
Cardstock (applied with adhesive):
- Pros: Sturdier than printer paper, gives a more premium feel.
- Cons: Can be trickier to adhere smoothly to curved surfaces, not waterproof unless sealed. Good for tags or flat panel labels.
-
Specialty Papers (applied with adhesive):
- Textured Paper (e.g., linen, laid): Adds a tactile, high-end feel.
- Parchment Paper: For a vintage or old-world look.
- Handmade Paper: Unique and artisanal.
When printing, always check your printer’s compatibility with the chosen paper type and thickness. For instance, some inkjet printers struggle with very thick cardstock or certain vinyls.
How Do You Make Jar Labels at Home?
Making labels for jars follows the exact same principles as making labels for bottles. The main difference might be the typical shape and size of the label area.
To make jar labels at home, design your label to fit the jar’s surface (often a round or oval label for the lid, and a rectangular or shaped label for the body), print it on suitable label paper or cardstock, cut it out, and then apply it to the clean jar using its adhesive backing or a separate adhesive.

The process is identical to bottle labeling, with perhaps more emphasis on lid labels or labels for wider, flatter surfaces.
Tips Specific to Jar Labeling:
-
Label Placement Options:
- Body Label: A wrap-around or front-facing label on the side of the jar.
- Lid Label: A circular or shaped label for the top of the lid. This is great for easy identification when jars are stored in drawers or viewed from above.
- Tamper-Evident Seal/Band: A thin strip label that goes over the lid and down the sides of the jar, breaking when opened.
-
Measuring for Lid Labels:
- Carefully measure the diameter of the flat part of your jar lid to ensure your circular label fits correctly without overhanging too much.
-
Dealing with Tapered Jars:
- If your jar is tapered (wider at the top than the bottom, or vice-versa), a simple rectangular label might wrinkle when applied. You may need to design a label with a slight arc or use a more flexible material. Test with a paper mock-up first.
-
Material Choice for Jars:
- If labeling jars for food items like jams or pickles that might get sticky or be stored in the fridge, waterproof labels (like vinyl) are highly recommended.
- For dry goods in a pantry, standard matte sticker paper or Kraft paper can be very effective and aesthetically pleasing.
Anna, a cosmetics manufacturer I work with, also makes small batches of herbal balms in jars for local markets. She uses simple, round Kraft paper labels on the lids and a small rectangular one on the side, printed with her home inkjet printer. It gives her products a lovely artisanal feel.
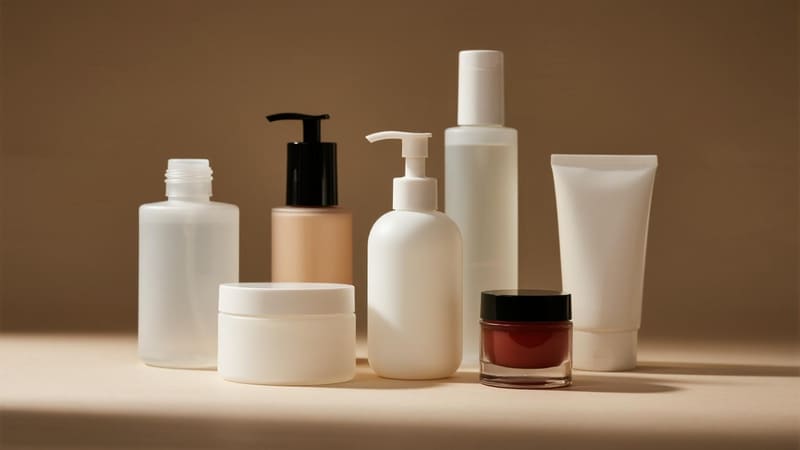
What is the Best Material for Bottle Labels?
The "best" material for bottle labels depends heavily on the bottle’s contents, its intended use, the desired aesthetic, and your budget. There’s no single answer, but some materials offer superior performance for specific needs.
For overall durability and water resistance, waterproof vinyl sticker paper is often considered the best material for bottle labels, especially for products exposed to moisture or requiring longevity. For a premium look on dry goods, high-quality matte or textured paper can be excellent. For eco-friendliness, recycled content paper or compostable options are gaining traction.

Choosing the "best" material involves balancing several factors.
Evaluating Label Materials:
| Material Type | Pros | Cons | Best For |
|---|---|---|---|
| Waterproof Vinyl Sticker Paper | Highly durable, waterproof, tear-resistant, professional look | Can be more expensive, may require specific printer compatibility | Bath & body products, refrigerated items, outdoor use, high-end products |
| Matte Sticker Paper | Good print quality, classic look, easy to write on, affordable | Not waterproof, less durable than vinyl | Dry goods, gifts, general indoor use, rustic/natural look |
| Gloss Sticker Paper | Vibrant colors, shiny finish, professional look | Can show fingerprints, may smudge with some inkjet inks, not waterproof | Product mock-ups, items not exposed to moisture, eye-catching designs |
| Clear Sticker Paper | "No-label" look, lets product show through | Print quality can vary, fingerprints, not always fully waterproof | Beverages, clear products, minimalist designs |
| Kraft Sticker Paper | Rustic, eco-friendly aesthetic, good for handwriting | Not waterproof, limited color vibrancy for printed designs | Artisanal products, natural/organic items, vintage look |
| Regular Paper/Cardstock (with adhesive) | Very inexpensive, widely available | Not durable, not waterproof, requires separate adhesive | Temporary labels, dry goods in protected environments, craft projects |
| Specialty Textured Papers (with adhesive) | Unique tactile feel, premium appearance | Can be expensive, may be harder to print on, not waterproof | Luxury homemade gifts, high-end artisanal products |
Key Considerations for "Best":
- Water Resistance: Crucial for anything that might get wet (e.g., shampoo bottles, beer bottles, items stored in a bathroom or kitchen).
- Durability: Will the label be handled frequently or exposed to friction?
- Print Quality: Do you need sharp, vibrant colors or is a more muted look acceptable?
- Adhesion: Ensure the adhesive is strong enough for your bottle material (glass, plastic, metal) and conditions.
- Removability: Do you want the label to be permanent or easily removable? (Special removable sticker papers exist).
- Aesthetic: The material should complement your product and brand style.
For many of my clients at ShineTop who are launching small-batch cosmetics and need professional-looking, durable labels before they scale up to our full production services, I often recommend starting with high-quality waterproof vinyl labels they can print themselves or source from a local print shop that specializes in short-run labels.
Conclusion
Making bottle labels at home is an accessible way to personalize your products and gifts. By choosing the right design tools, paper, and application methods, you can create attractive and functional labels that enhance the appeal of your homemade creations. Whether you opt for simple paper labels or durable waterproof vinyl, the key is to match the label to the product’s needs and your desired aesthetic.